Tutorial 3: An urban network on terrain
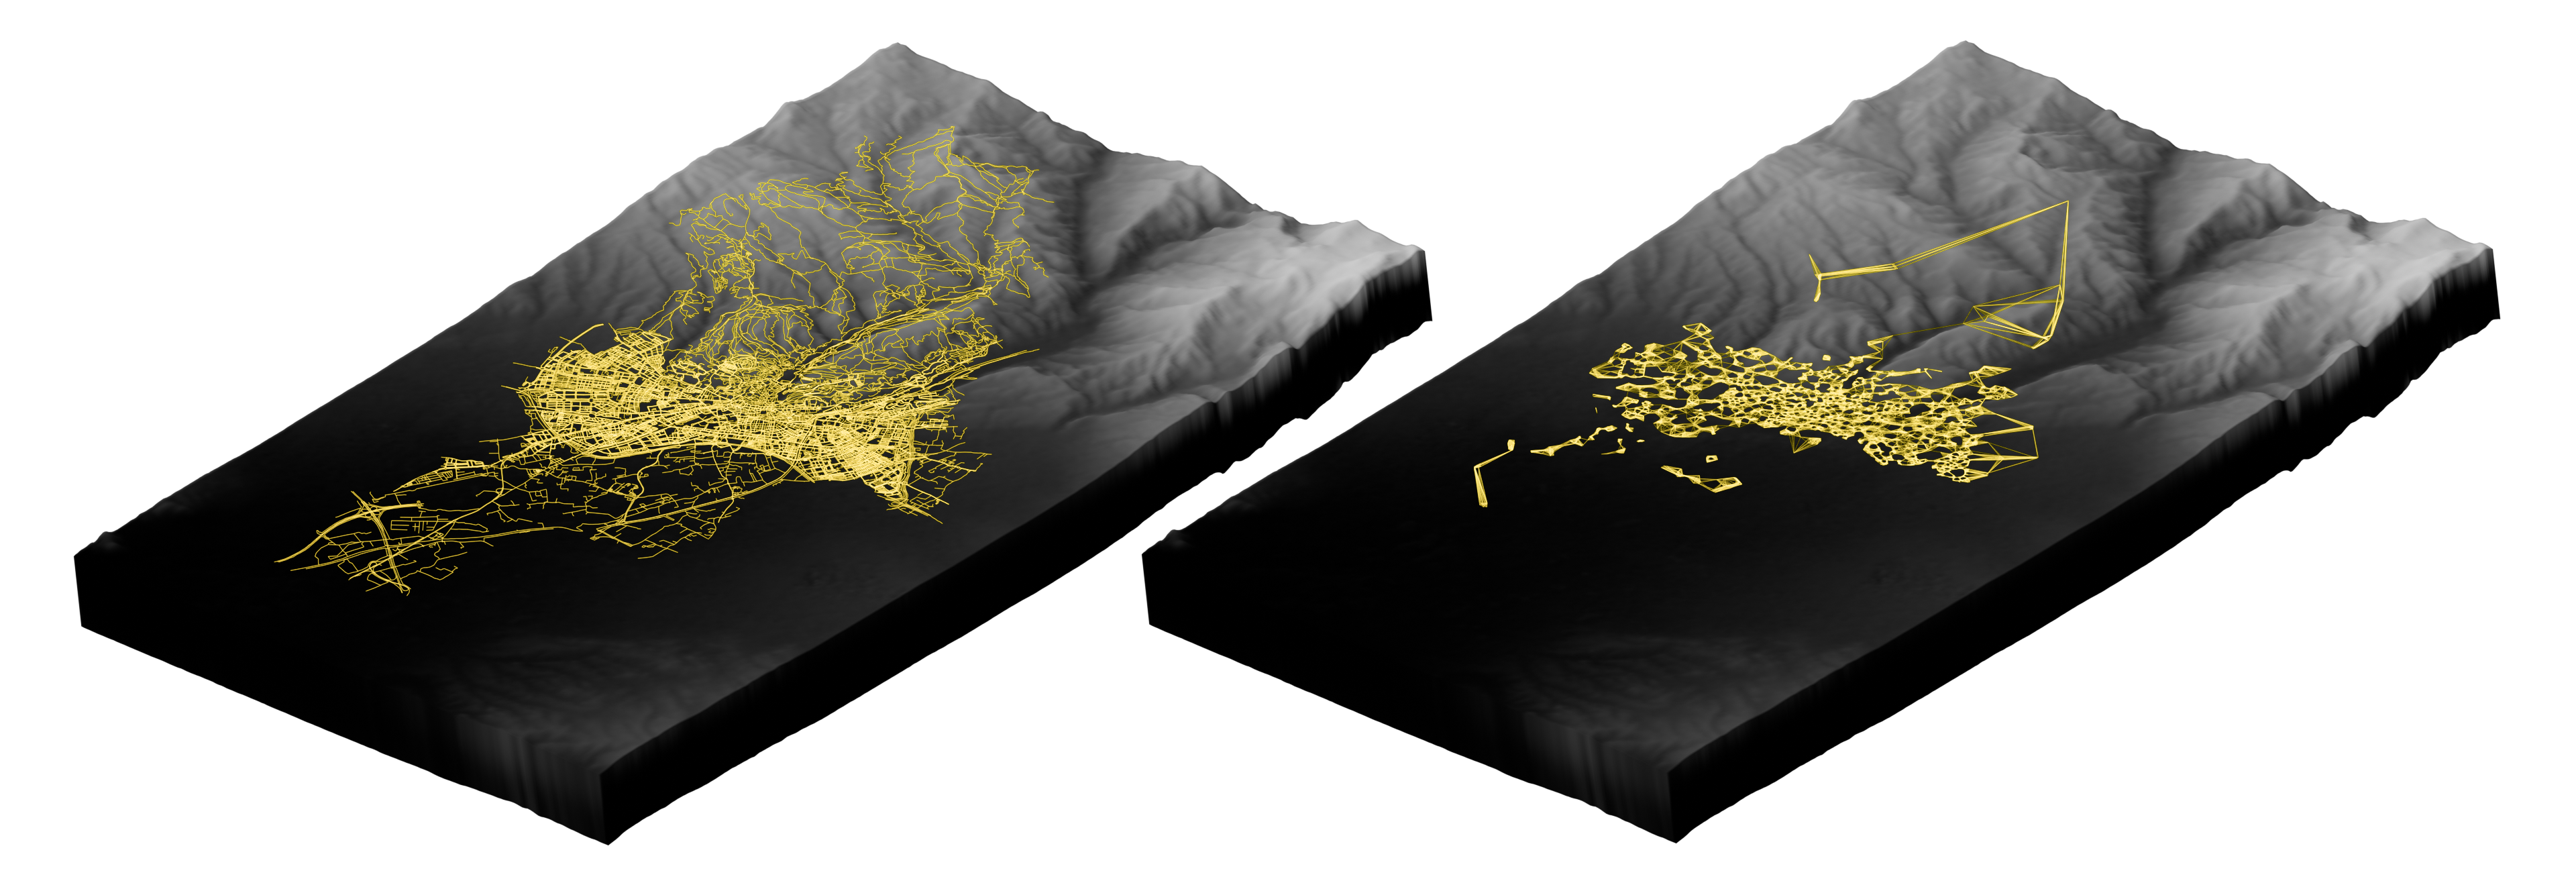
1. Download the street network
- Open the OSMnx tab and expand Download.
- Choose a method. Place is simplest; enter e.g.
Granada, Spain. Pick the network type (drive,walk,bike…). - Set Options (Simplify, Keep Curved Geometry, Scale Factor) and press Import from OSM.
2. Project and add attributes
- In Graph Operations, press Project to CRS so distances are metric.
- In Network Attributes, add Lengths, and optionally Speeds and Travel Times.
3. Add terrain
- Expand Elevation & Terrain.
- In 1 · Get Elevation Data, choose a DEM source (OpenTopography with an API key, Open-Elevation, or a local GeoTIFF). Enable both apply to nodes and create terrain, set the Vertical Scale, and press Get Elevation Data.
- In 2 · 3D Positions, press Apply 3D Positions so the network conforms to the terrain surface.
- Optionally compute 3 · Slope / Grade, then add a 5 · Basemap Texture (OSM/ESRI tiles, WMS, Mapbox, or MapTiler) onto the terrain mesh.
4. Add an amenity proximity graph (City2Graph)
- With the OSMnx network active, open the City2Graph tab and expand Data Import. Set Define Area to From OSMnx and download places/amenities.
- Expand Proximity Graphs ▸ Single-Layer. Set Features to the amenities object, choose KNN with
k = 20, and a Network distance metric pointing at the OSMnx street network. - Press Generate Graph. The amenity graph drapes onto the same terrain: service density concentrates in the valley, and isolated mountain amenities produce long-range connections.
5. Visualize and render
Use the Visualization panel to size and color the street and amenity layers. For OSMnx edges, enable Preserve Street Geometry in Edge Style. Frame the scene and render with Cycles.